
Showing posts with label Commissions. Show all posts
Showing posts with label Commissions. Show all posts
Friday, August 31, 2012
Allie Commission Final
After a year of off and on attempted progress on this commission I finally finished. Not long ago I actually restarted the work to tweak some details and completed the entire painting in acrylics.

Wednesday, July 13, 2011
Day 2 of Allie Modell Commission
On my second day of work for this portrait I applied a layer of Viridian Hue to deepen and darken the shadows.
After I get a little further along with this portrait I intend on resuming work on my previous commission and alternating work between the two paintings until they are completed. Once I've finished the commissions, I'd like to resume and complete the four oil portraits I started almost two years ago and the acrylic slot canyon paintings I began last fall. Well, that is if everything goes as planned...
![]()
After I get a little further along with this portrait I intend on resuming work on my previous commission and alternating work between the two paintings until they are completed. Once I've finished the commissions, I'd like to resume and complete the four oil portraits I started almost two years ago and the acrylic slot canyon paintings I began last fall. Well, that is if everything goes as planned...

Day 1 of Allie Modell Commission
For the first day of real work on my latest commission I applied a layer of oil Alizarin Crimson over my projection to help establish the shadows and shapes.
![]()

Allie Modell Commission Projection
After far too long of a break caused by moving back to Montgomery and an endless stream of housework, I began a new piece recently, but I lack a reliable internet connection and haven't been able to post about it until now. Hopefully, I'll be able to break free of my affliction of starting pieces then having to take time away from art, then starting new ones to help get back in the swing before resuming half-done works, since I now have seven previous in-progress paintings already waiting at the moment. My newest work comes to me as a commission and like my previous one is based off of a simple black and white photograph.
I started the painting by constructing the canvas and giving it half a dozen coats of gesso before doing my preliminary projection in acrylic Ultramarine Blue.
![]()
I started the painting by constructing the canvas and giving it half a dozen coats of gesso before doing my preliminary projection in acrylic Ultramarine Blue.
Wednesday, February 9, 2011
Day 6 of Tintype Commission
I started the day with a focus on getting the background wall and shadow better established. I did this by applying Yellow Ochre to the upper left corner and blended that out in the shape of the shadow. I then worked in a little Burnt Umber mixed with Paynes Gray into the shadow area and finally blended it all together. Next, I began working on the floor with Titanium White followed by Mars Black. I then did a minute amount of work on the legs and shoes, followed by a quick layer of flesh tone to the face and hands, and finished with working on the dress in Alizarin Crimson and Yellow Ochre.


Here's the day's video:
Saturday, February 5, 2011
Day 5 of Tintype Commission
I started the day by applying some Yellow Ochre to the upper left corner of the background to begin the establishment of a wall and cast shadow, which should add to the desired Baroque appearance. I blended that out with some Burnt Umber, repeated the process for a while, but there's much work to be done. Next, began to reform the hair using Yellow Ochre and moved to working on the table a little after that. I finished my work by filling the blank areas of the dress with Yellow Ochre. I still have probably another day or so of general light work where my focus is just getting paint on the blank areas before I move to a more detailed and focused process.


The video for the day...
I only got around 45 minutes of work in today so when I was editing the video I only sped it up by a factor of 8 and not 16. So instead of a time lapse appearance, the action appears more super speed.
Wednesday, February 2, 2011
Day 4 of Tintype Commission
I began the day's work by applying a thin layer of Burnt Umber to the top left corner of the background and slowly bled that out around the left side of the girl's head with a Burnt Umber and Paynes Gray mix and then finished the remainder of the background with Paynes Gray mixed with only a hint of Burnt Umber. I then turned my focus to the table by reestablishing the main form and highlights with a light layer of Yellow Ochre. I then finished my work with a layer of Alizarin Crimson over the red parts of the dress.


Here's the video for today's work:
In case any of you readers were curious as to my process for the production of these videos, let my give a brief run down of all that goes into making one. Before I begin filming each day, I first devise a 'plan of attack' for what I intend on working on and then I get all my paints and brushes ready to best fit that plan. Because I know my camera has only a 70 minute capacity I set a timer for about an hour and then get to work. After I the timer goes off I work to get to a good stopping point and cease my work for the day and then upload the video from my camera to my computer. To edit and make the videos I use Windows Live Movie Maker. I begin the editing process by first speeding up the video by a factor of 16, which creates the time lapse effect. I then add in my three title screens, ie. the actual title, the 'On Palette,' and the 'Music.' By this point I have the general length of the video established so I open up my iTunes and sort my music by track length. Next is a simple matter of finding a desirable track of the appropriate length to add to the video and then I'm done.
Saturday, January 22, 2011
Day 3 of Tintype Commission
I started today's work by applying a transparent layer of a 2:1 Ultramarine Blue/Burnt Umber mix to the background. I think painted in a layer of Burnt Umber over the shadow parts of the table, the hair, the shoes and socks, and finally the dark floor squares. I finished my work with a little Titanium White on the book paper, the pantaloons, and light floor squares.


Here's the video for today's work:
Monday, January 17, 2011
Day 2 of Tintype Commission
Today was a basic day of work on Tintype Commission. It was mostly a repeat of Day 1 but with Viridian Hue instead of Alizarin Crimson. I started with a light transparent layer of Viridian Hue over the entire background and then mixed Viridian Hue and Alizarin Crimson together to paint in a layer over the dark parts of the table and over the hair, socks and shoes.

Here's the video for today's work.

Friday, January 14, 2011
Day 1 of Tintype Commission
With the holiday season now over, it's time for me to get back to work on my pieces in progress. I spent about an hour last week working on the color patterning for the dress in Tintype Commission and finally reached an ideal design so the only thing holding me back from working was the cold. I've been hoping to get some work done at night after work, but my studio, which is a patio turned sunroom with no central heat, has simply been too cold but hopefully that trend will soon be ending. In other art related news, I finally renewed my Flickr subscription and the entirety of my photo collection is again available for viewing at http://www.flickr.com/photos/wyndawson. The majority of the photos are from my personal travels throughout the country and many have provided source material for my art works.
Today was an off day so I was able to get a little work in on Tintype Commission while the sun was providing heat. My work today consisted of what I have called 'Stage 1' in previous oil works. I simply applied a thin transparent layer of Alizarin Crimson over the entire piece to help darken the shadows and better establish the forms.

Today was an off day so I was able to get a little work in on Tintype Commission while the sun was providing heat. My work today consisted of what I have called 'Stage 1' in previous oil works. I simply applied a thin transparent layer of Alizarin Crimson over the entire piece to help darken the shadows and better establish the forms.

I decided to also film my progress for this piece and edit it like I have been for my work on Phoenix Rising, and thanks to my experiences with those videos nothing went wrong with today's filming.
Friday, December 24, 2010
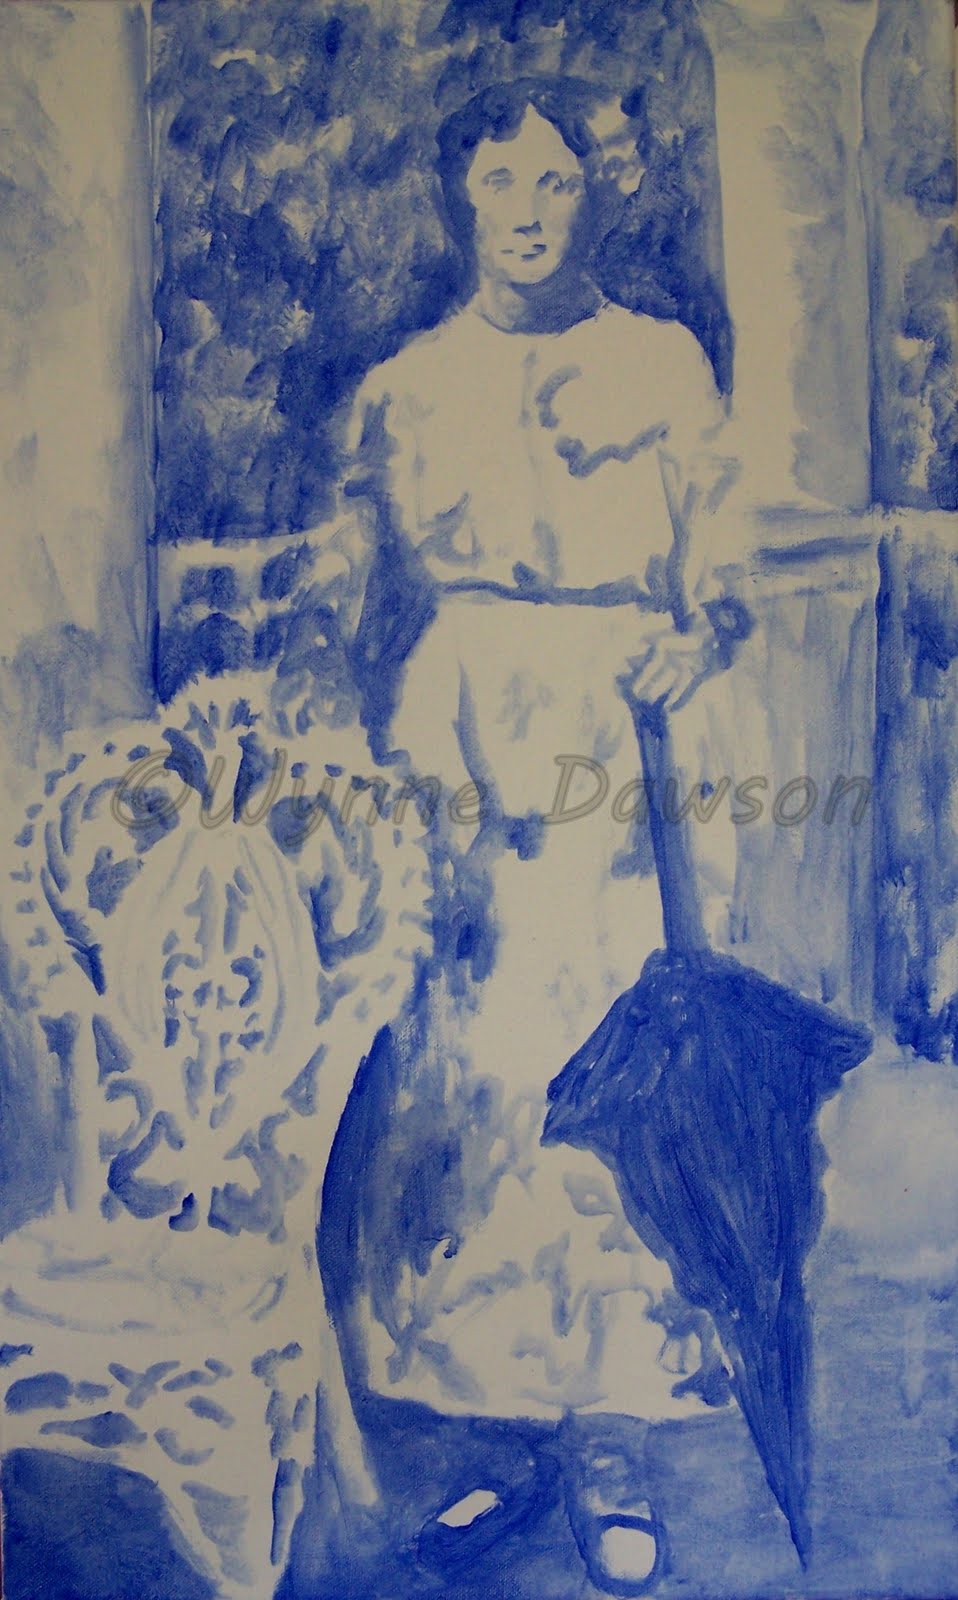
Tintype Commission Projection
This past week I've spent my time after work constructing, wrapping, and gessoing a canvas for a commission that I received. The commission is an oil portrait of the patron's grandmother's grandmother and the source image is a 19th century tintype of which I was provided a scanned print.
After I believe 8 coats of gesso, a final wash of gesso/Burnt Sienna tint, and a little light sanding, my canvas was ready for projection. I used my standard projection pigment of acrylic Ultramarine Blue to establish the composition's forms and values and applied a final dark wash to the background to create a more Baroque light quality.

After I believe 8 coats of gesso, a final wash of gesso/Burnt Sienna tint, and a little light sanding, my canvas was ready for projection. I used my standard projection pigment of acrylic Ultramarine Blue to establish the composition's forms and values and applied a final dark wash to the background to create a more Baroque light quality.

Subscribe to:
Posts (Atom)